
Style BPMN Diagrams With Stylesheets: 6 Use Cases

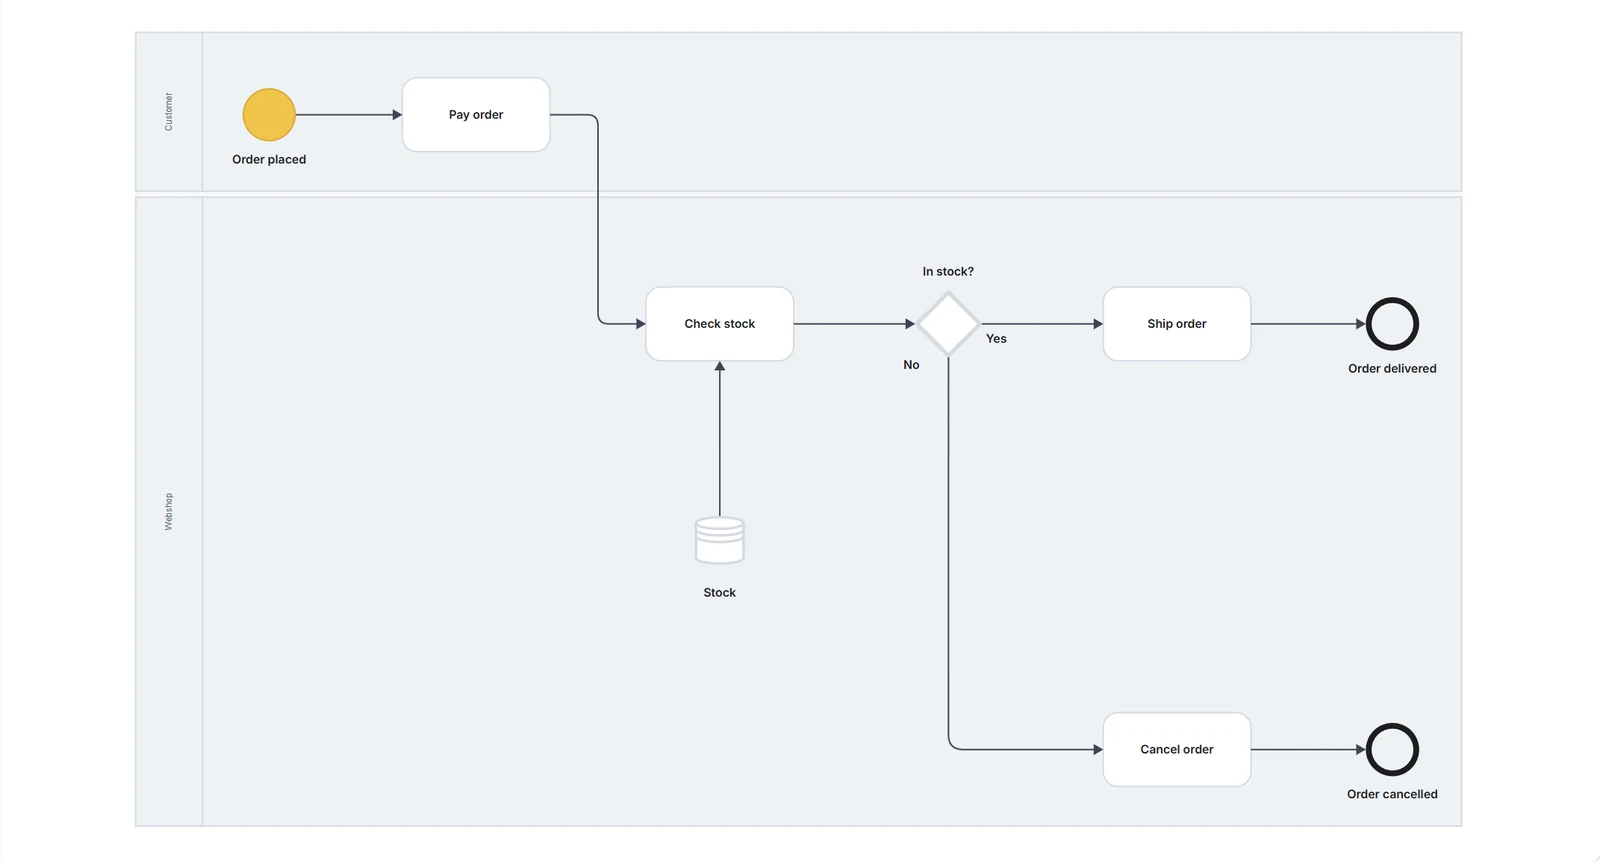
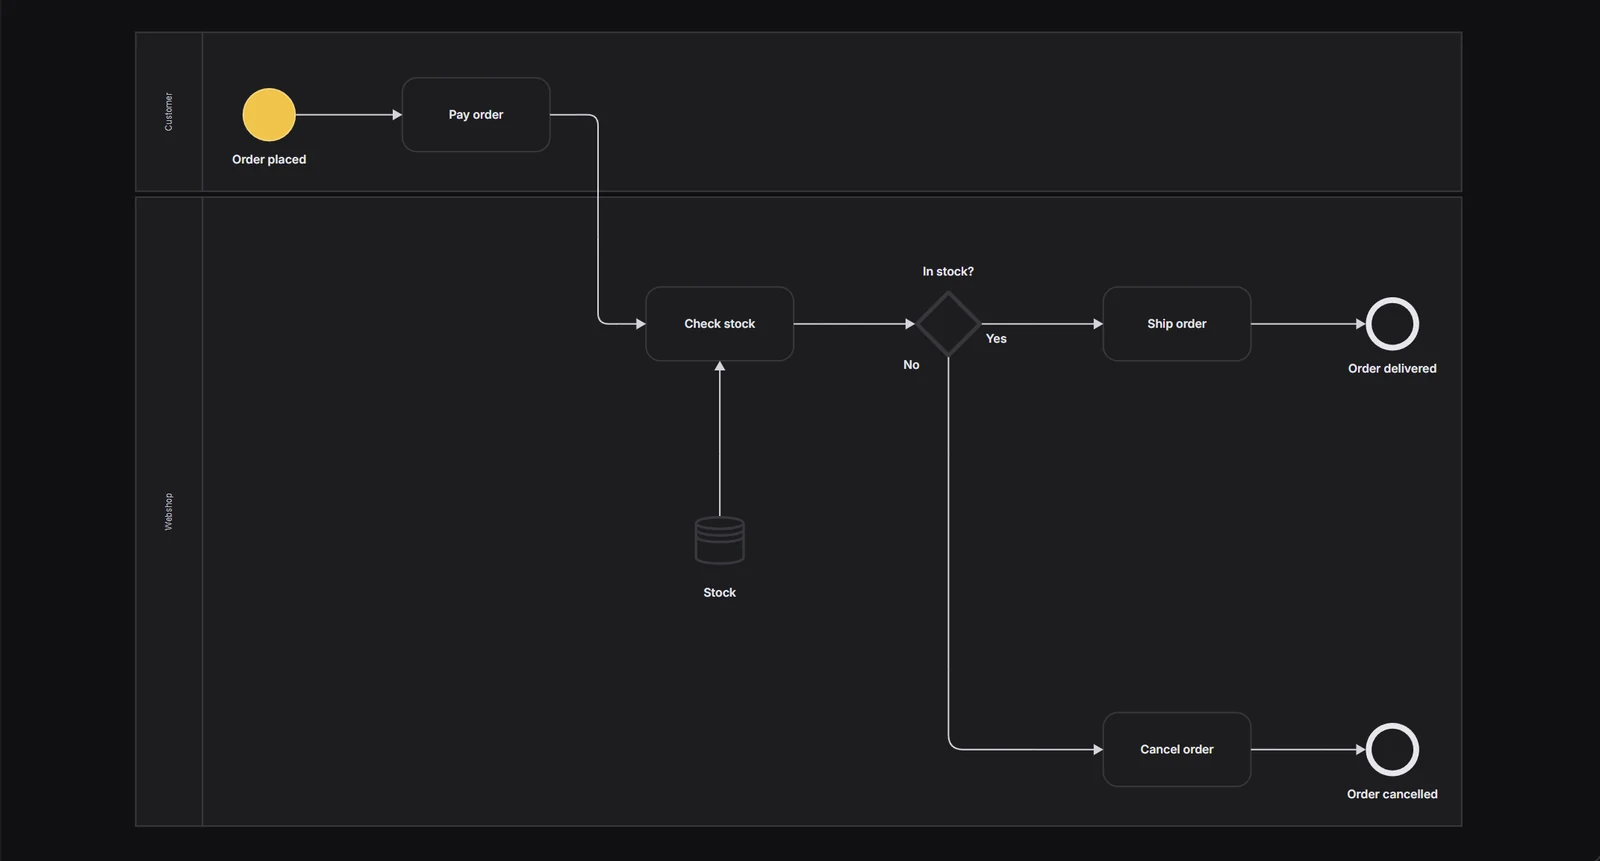
Styling BPMN diagrams with a stylesheet means you decide the look once and every diagram follows. In Instant Process, a short stylesheet sets colors, fonts, spacing, shapes and the flow direction. The process itself stays untouched, so one change restyles every diagram that uses it, without selecting or moving a single shape.
That sounds like a detail until you meet the situations where it matters: a client who wants their own house style, a rebrand halfway through a project, a handbook that needs portrait pages. This article walks through six of those use cases and compares the stylesheet approach with styling shape by shape in a drag-and-drop editor.
Key takeaways
- In Instant Process, what a process contains and how it looks are separate. The process holds the content; the stylesheet holds the look.
- One shared stylesheet keeps a whole team's diagrams consistent, and a change to it reaches every diagram that uses it.
- The same process can be shown in a light print style, a dark slide style or a portrait layout without redrawing it.
- Highlighting a step for a workshop is a click on that step, not a manual recolor you have to undo later.
- Everything happens in an easy styling dialog with color pickers and a live preview, or through your AI assistant in plain language.
Why style BPMN diagrams with a stylesheet instead of shape by shape?
Styling shape by shape works for one diagram and breaks down at ten. In most drag-and-drop editors, colors and fonts belong to the shapes you placed, so every new diagram, every new colleague and every change of house style means formatting shapes again. A stylesheet moves the look out of the shapes into one file that every diagram points at.
Drag-and-drop tools such as Visio, Lucidchart and draw.io offer themes, style presets or a format painter, and those help. But the style still ends up stored on each shape. Change the brand color and you change it diagram by diagram, and nothing stops two analysts from picking slightly different blues.
In Instant Process, the shapes never carry their own formatting. A diagram is drawn from the process plus a stylesheet, so the look is defined once and applied everywhere. A process can carry a few one-off tweaks of its own, and everything else comes from the shared stylesheet.
| Task | Styling shape by shape | Instant Process stylesheet |
|---|---|---|
| Apply a house style to a new diagram | Apply a theme or format shapes, then fix what the theme missed | Pick the stylesheet; the diagram is drawn in it |
| Change the brand color on 40 diagrams | Open and update each diagram | Change one value in the shared stylesheet |
| Keep a team consistent | Agree on conventions and check by eye | Everyone uses the same company stylesheet |
| Make a portrait version for a report | Rearrange the diagram by hand | Switch the flow direction to top-to-bottom |
| Highlight steps for one meeting | Recolor shapes, then undo it afterwards | Click those steps with the pen, reset afterwards |
| Show the same process on a slide and in print | Duplicate and recolor | Switch between a light and a dark stylesheet |
How do you style a diagram? A walkthrough in five steps
Styling a diagram in Instant Process takes about a minute: open Styling, choose a direction, pick your colors and apply. No design skills and no code. Below is the full walkthrough on a simple webshop order process, captured in the free trial editor that anyone can open without an account.
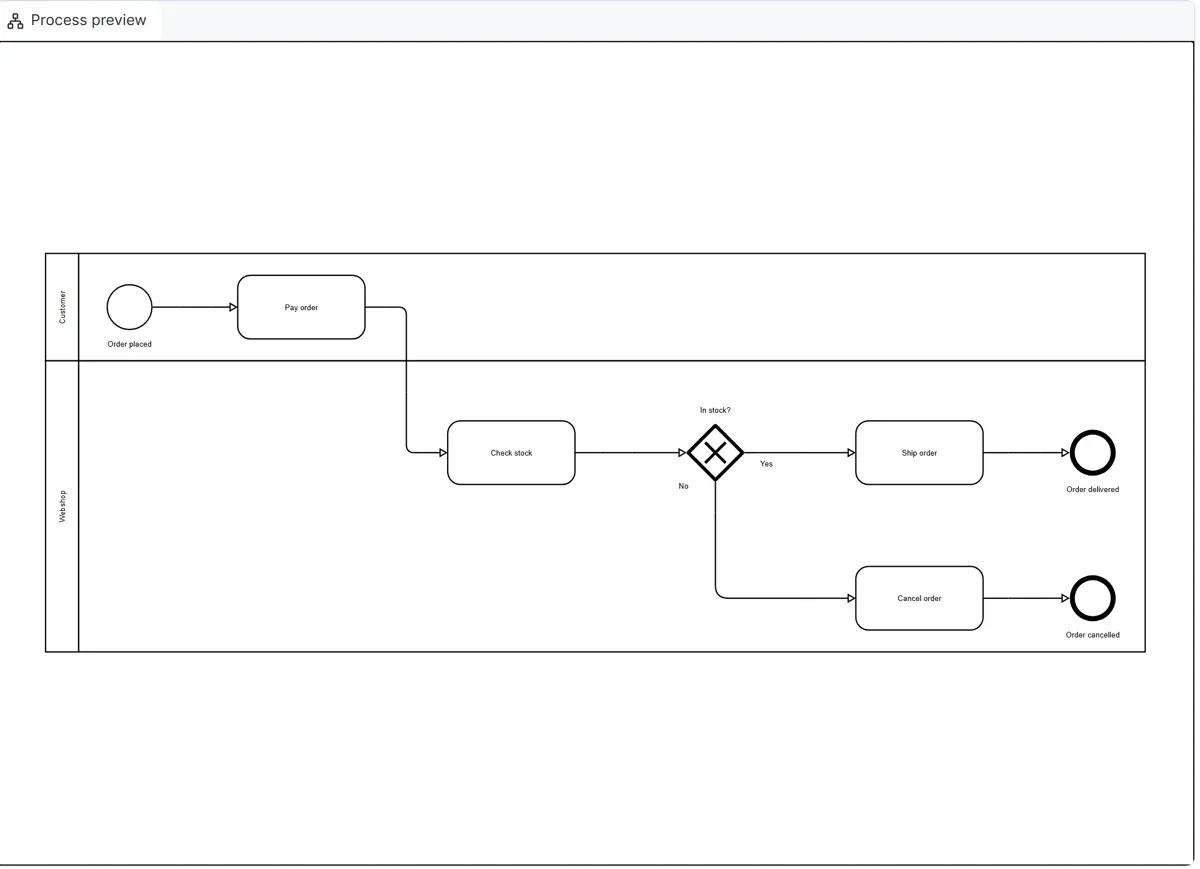
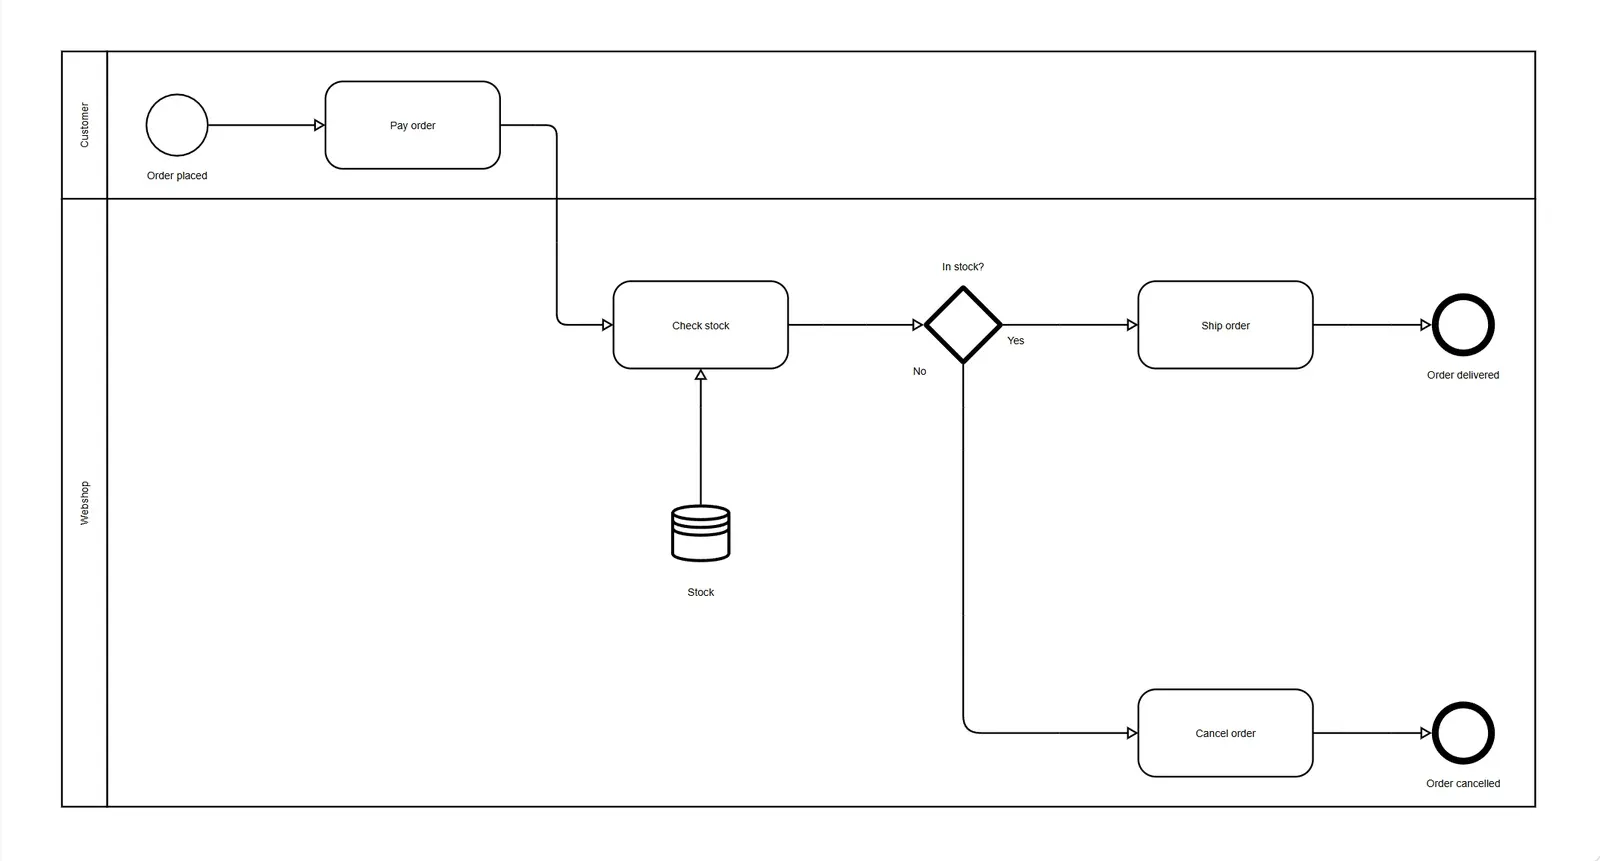
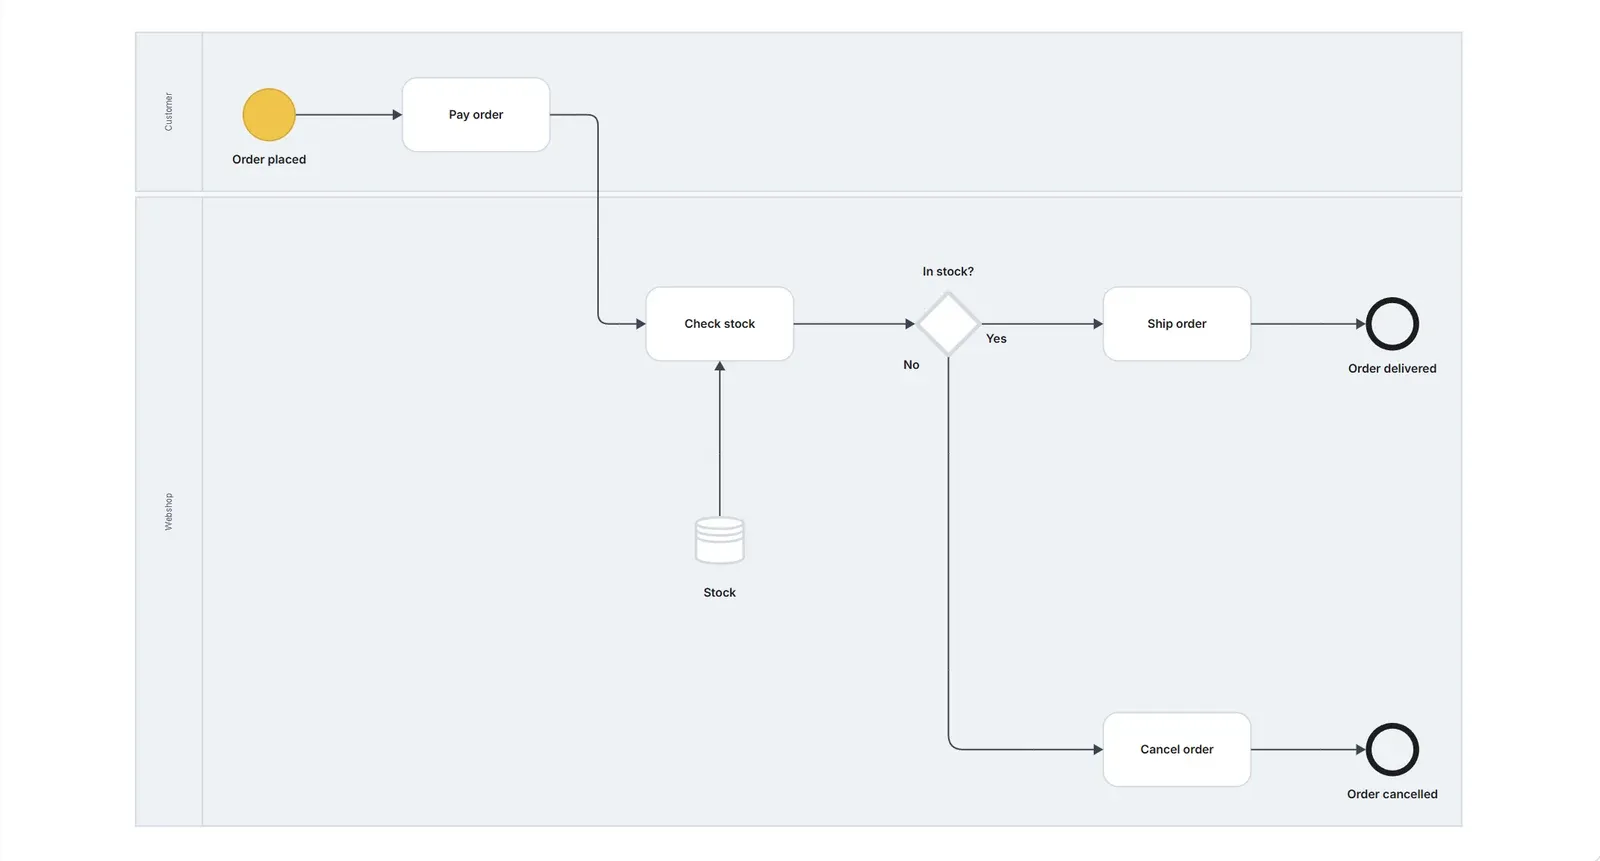
Step 1: Start with your process. This is the order process as the editor draws it by default: the Classic Light style, flowing from left to right, with a Customer lane and a Webshop lane.
Step 2: Open Styling. Click the palette icon in the editor toolbar. One window holds everything: the stylesheet, the direction the process flows in, and six colors for the background, the start, the ends, the other steps, the arrows and the text.
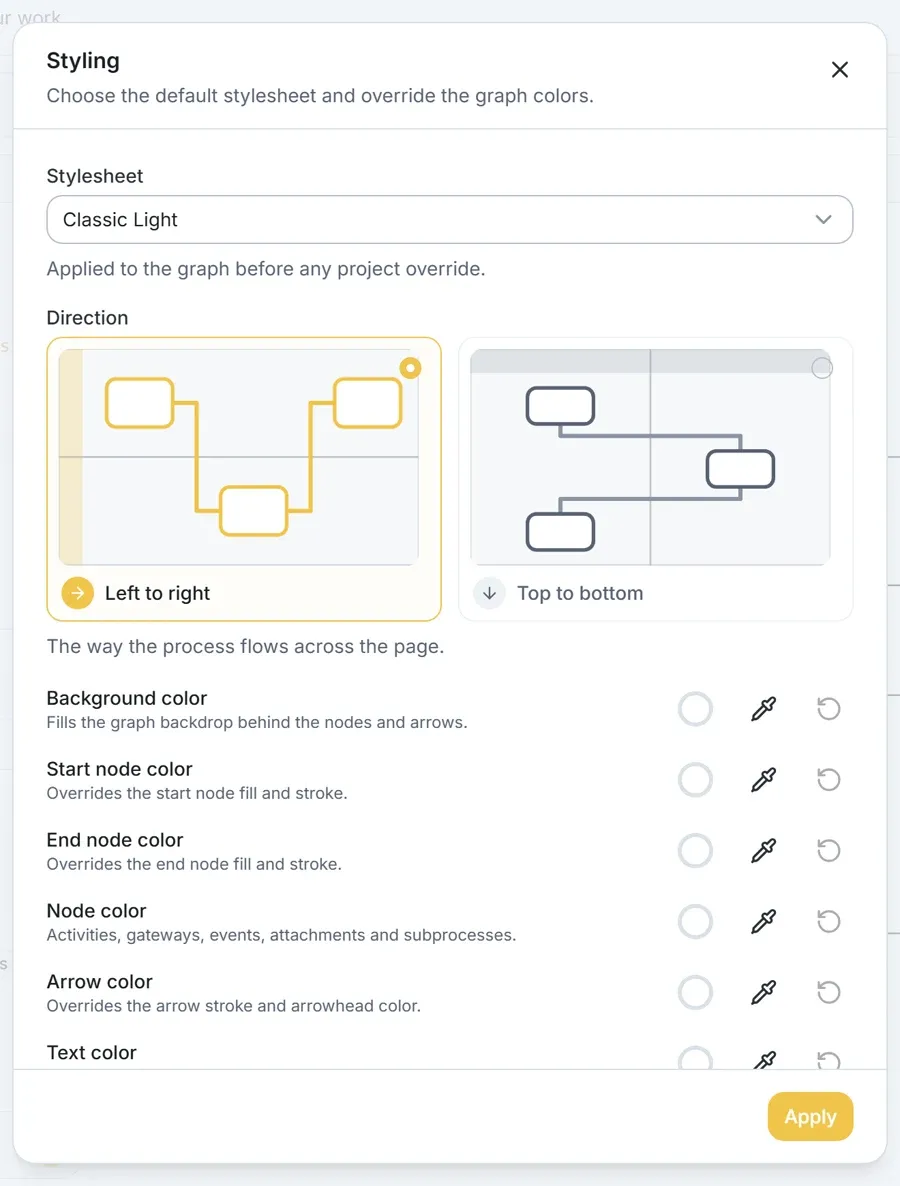
Step 3: Choose the direction. Pick Top to bottom for portrait pages such as reports and handbooks, or keep Left to right for slides and screens. The small previews on the cards show what each option does.
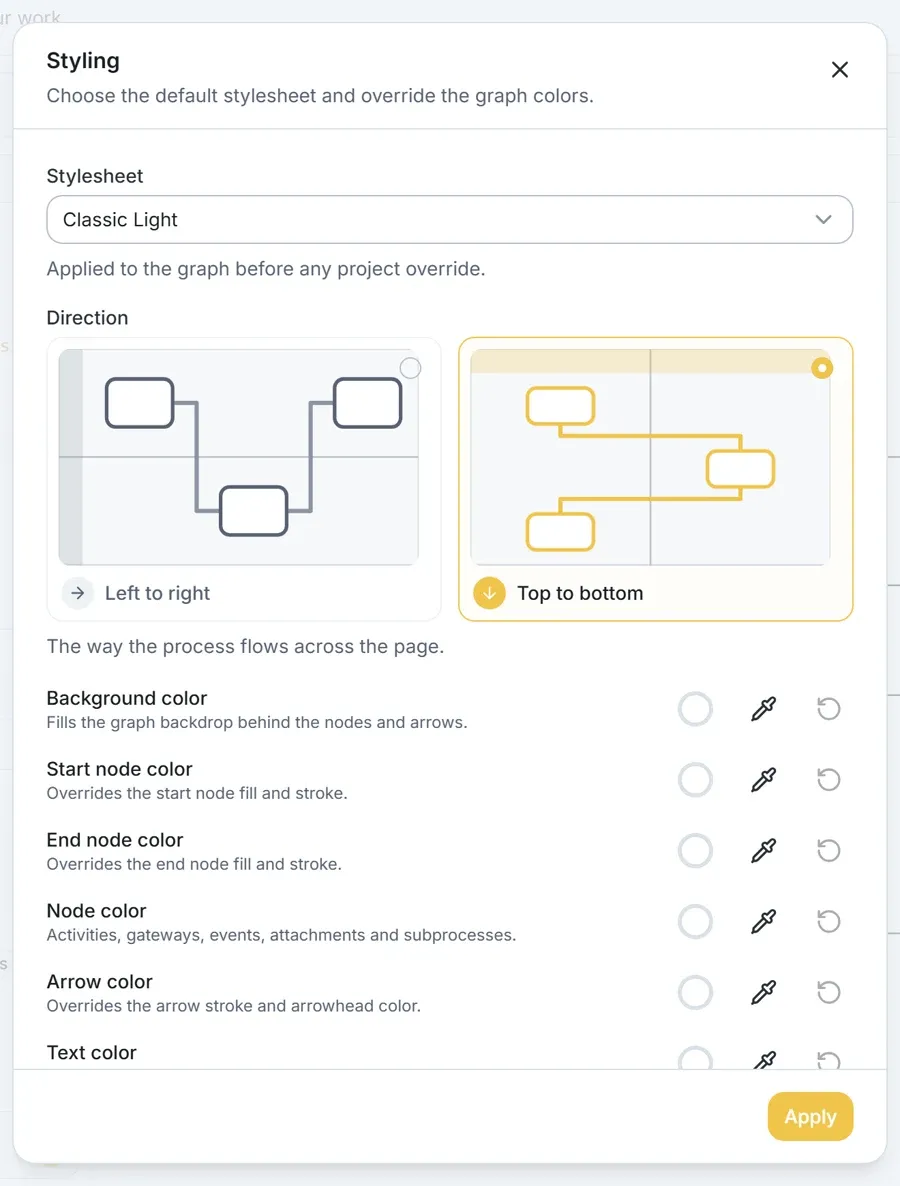
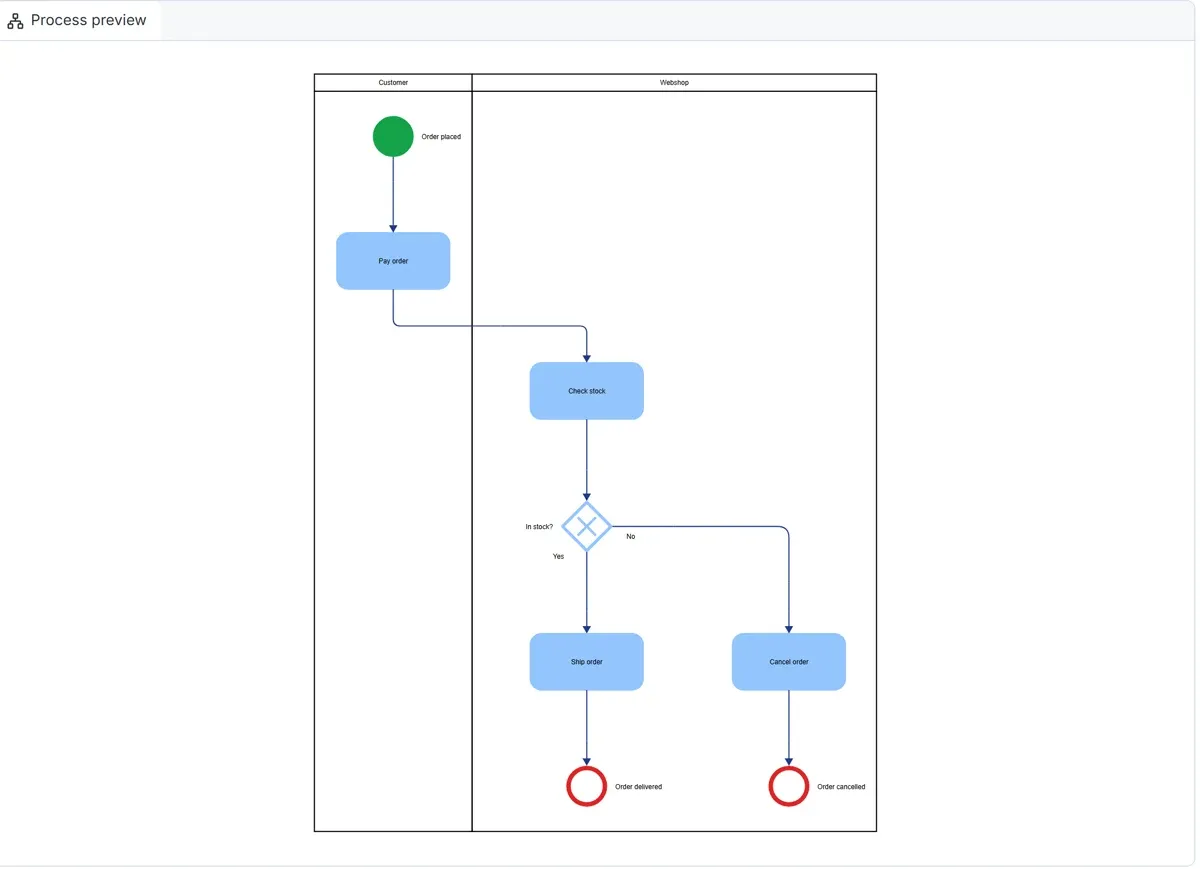
Step 4: Pick your colors. Click a color circle and choose a color, or paste your brand's hex code. In this example the start is green, the ends are red, the steps light blue and the arrows dark blue. Every color has its own reset button, so trying something costs nothing.
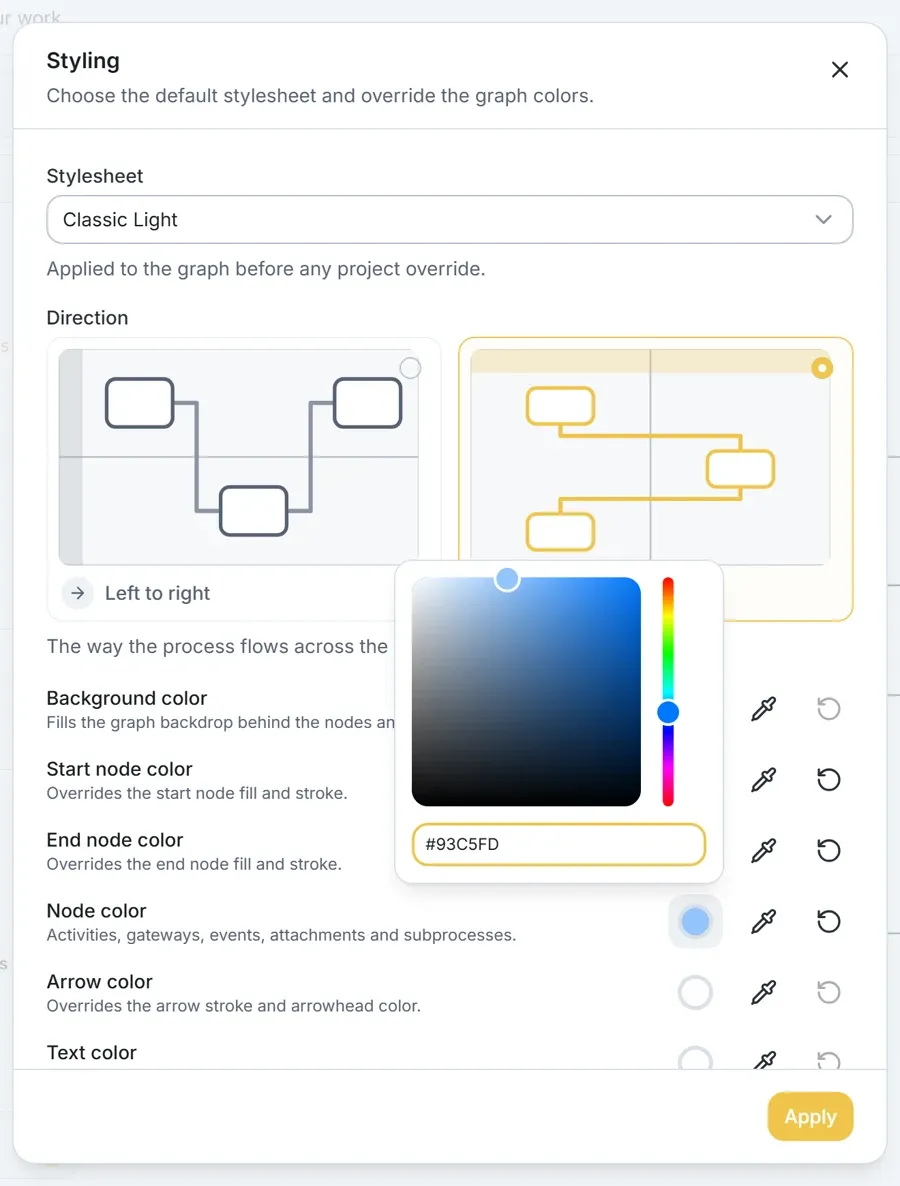
Step 5: Apply. The diagram redraws in its new style. The steps, lanes and decisions are exactly the same; only the look changed.
For a complete house style, the stylesheet panel goes further: fonts from eight embedded font families, spacing and node shapes, saved under a name your whole team can pick. Fonts travel with SVG exports, so an exported diagram looks the same on any machine.
Prefer to describe what you want? Connect an AI assistant such as Claude or ChatGPT through the Instant Process MCP server and ask it in plain language, for example: "Make the Order handling process top-to-bottom, with a green start and red ends, and show me the result." The assistant applies the change and renders the process in the chat.
Use case 1: Deliver process maps in your client's house style
Consultants can deliver every process map in the client's own colors and font by creating one stylesheet per client. Set the client's font and text color once, give tasks and lane headers their brand colors, and every process in that client's folder renders in that style. The next assignment gets its own stylesheet.
Setting up a client style takes a few minutes. Start from the predefined stylesheet that comes closest, pick the client's colors with the color pickers, choose their font, and save it under the client's name. From then on it is one choice in a list.
Because the client sees their own branding from the first draft, the diagrams feel like their documentation, not your tool's output. That matters most at handover, when the client has to keep the model alive after you leave. Our real-world MCP walkthrough follows such an assignment from interview to handover.
Use case 2: Survive a rebrand without redrawing anything
When a company changes its brand colors or font, every process diagram that uses the company stylesheet follows as soon as someone updates that stylesheet. Nobody opens individual diagrams. A shared stylesheet renders with its latest version everywhere, so the process library is up to date the moment the change is saved.
Compare that with diagrams styled shape by shape: a rebrand turns into a project of its own, and in practice old colors linger in the diagrams nobody got round to. With a stylesheet there is no "old diagram" left behind, because the brand colors live in one place instead of on thousands of shapes.
Use case 3: Fit portrait reports, handbooks and ISO documentation
To fit a BPMN diagram on a portrait page, switch its flow direction to top-to-bottom. Lanes become columns with their labels across the top, and the layout engine redraws the whole process vertically. The process itself does not change, so the same model can appear landscape on screen and portrait in a handbook.
It is one click: open Styling, choose Top to bottom and apply, exactly as in step 3 of the walkthrough above. In a drag-and-drop tool, the same change means dragging every shape and rerouting every arrow, which is why most portrait process maps are simply shrunk landscape diagrams that nobody can read.
Use case 4: Highlight the steps that matter in a workshop or review
To make steps stand out in a workshop, select them in the preview and give them a color, or click them with the pen. The change applies to those steps only and is stored with that process, so the shared house style stays clean.
Typical uses: the bottleneck you want the room to discuss, the steps that change in a to-be design, or the steps a new control adds for an audit. After the session, reset the highlight and the diagram is back to the house style. Our article on as-is vs. to-be process mapping shows how to structure that comparison.
Use case 5: Use the same process on slides, on screen and in print
One process can be shown in different styles for different media by switching its stylesheet. Instant Process ships four: Classic Light, Classic Dark, Modern Light and Modern Dark. A dark style suits slides and screen sharing, a light one suits print and PDF. The model stays a single version.
Here is the same order process twice, first in Classic Light and then in Modern Light. Nothing about the process changed, only the stylesheet:
With shape-by-shape styling you would keep two copies of the diagram, and sooner or later one of them would be out of date.
Use case 6: Keep a whole team's diagrams consistent
A team keeps one look by sharing a company stylesheet that every process points at. Members pick it from the list instead of choosing colors themselves, and only an owner or admin can change it. The result is a process library where every diagram looks like it came from the same hand, whoever drew it.
| Scope | Who sees it | Who can change it |
|---|---|---|
| Personal | Only you | You |
| Company | Every member of the company | An owner or admin |
| Predefined | Everyone | An owner or admin can edit the company's own version |
Consistency is not only about looks. When every diagram uses the same colors for the same element types, readers learn the visual language once and read every process faster.
Which plan includes stylesheets?
Picking a stylesheet, setting a process's six main colors and choosing the flow direction are part of the Free plan. Fonts, shapes, spacing, highlighting single steps and creating shared named stylesheets are part of Premium, which every account gets for free during the open beta. See pricing for everything each plan includes, and the product page for the rest of the editor.
Use it free now
Create an account to build a stylesheet in your own or your client's house style, or open the trial editor first to switch between the predefined stylesheets on a process of your own. Premium, including full stylesheet authoring and the MCP server, is free during the open beta.
Give every process diagram your house style
Bring Process Mapping Into Your AI Workflow With MCP
A real-world walkthrough for process analysts and consultants: from a discovery interview to a validated BPMN process, with Claude, ChatGPT, Cursor or Copilot connected to Instant Process through MCP.
Text to BPMN
How to Turn a Process Description Into a Clear BPMN Diagram